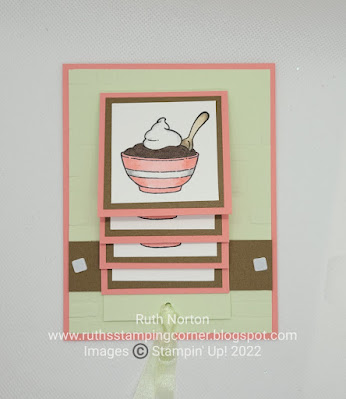
I'm so excited to share this card with you today, I actually have 4 that I'm sharing plus a video! I love a card with movement, interactive cards are some of my favorite. It's been a long time since I've made a waterfall card, I still remember the first time I saw one. It was pure magic! How was it even possible. Today I'm going to share the secrets with you with a fun set of cards. Supplies for each card is listed on the bottom of this post. The card I demonstrated in the video is this adorable pudding one. So we'll talk the most about this one. The process is the same for all of them though. I'm using the A Little Cheesy Set for all four of my cards. The images and greetings are the best punny greetings ever! You know I love a good pun!
What is a waterfall card? When you pull the tab on the bottom the images on the front will rotate through until you get to the final image. I promise whoever you give this card to will have endless hours of playing with it! My waterfall cards have four panels, I stamped the images three times and the greeting on the final one for all my cards. For my pudding, I colored each bowl of pudding differently, there's chocolate pudding, vanilla and pistachio.
Make sure you check out the video for the full effect of how awesome these cards are. For my pudding card I went with a softer color combo. I used Flirty Flamingo, Soft Seafoam and Soft Suede. I love this fun greeting!
The next card uses the cheese image. I went with a Calypso Coral, Pale Papaya and Basic Gray Color Combo for this one. This card is also the only card that features a die cut background and not an embossed background. For most of my cards I kept the backgrounds simple with an embossing folder. For this card I wanted to mimic the cheese so I used my Dots and Spots Die to die cut the backround and I used some Blending Brushes to add some Pale Papaya Ink around the edges for more dimension.
I stamped my image three times just like in the pudding sample, they're all colored identically. I used Pale Papaya Stampin' Blends. When you flip through the images you'll see the greeting at the end. This greeting was a little longer than the cardstock so I stamped it on an additional piece of cardstock then trimmed it and adhered it inside. I love the look of that too. You can use multiple colors for added texture.
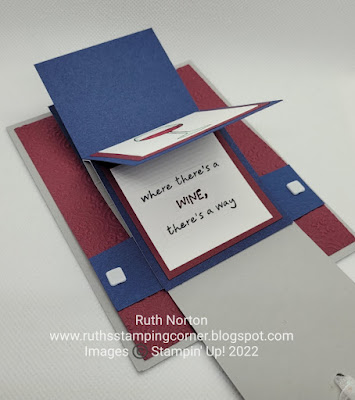
Just like the cheese card for my wine card I stamped and colored the three images identically. All of the cards have an anchor piece across the card. This isn't adhered onto the card but instead it's held on with brads. This is an important part of the waterfall card. You need that back piece to move freely behind the anchor piece so adhering the anchor piece only with brads allows that movement. I added ribbon to all of my cards on the piece that gets pulled down. The ribbon helps to indicate they need to pull it. You can also add small arrows if you wanted.
Also like the cheese card, this greeting was too long so I stamped it on another piece of cardstock and added it. This one has the embossed background like the pudding and cookie cards as well. When you have a card that is already complex, either with movement or a fun fold it's ok to keep everything else simple.
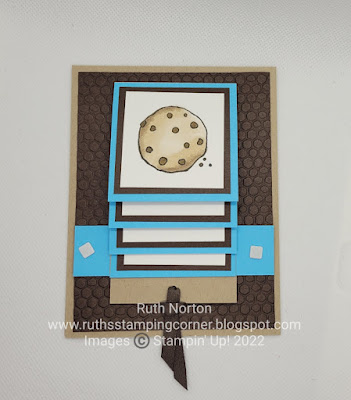
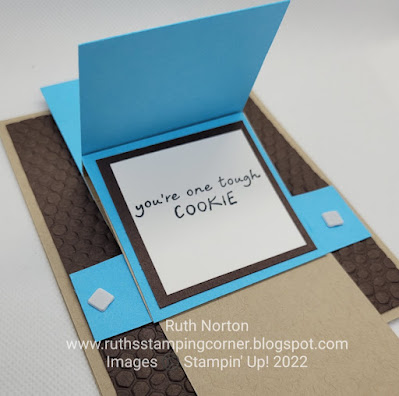
Finally my last card is the cookie. I don't think I can pick a favorite but IF I were forced to, this one might be it. But I LOVE the pudding and cheese and wine one too. Who am I kidding I can't choose. Make sure to check out the video for details on how to create these waterfall cards.
Card base 4 1/4" x 11" scored at 5 1/2"
Background 4" x 5 1/4" (either embossed or die cut)
Anchor 4" x 1"
Waterfall piece 2 1/2" x 8 1/2" score long side at 2 1/2", 3", 3 1/2" and 4"
Layers, four of each:
Basic White 2" x 2"
Middle layer 2 1/4" x 2 1/4"
Outer layer 2 1/2" x 2 1/2"
Supplies are listed below for each card. You can shop for these products in my Online Store. Check out my video for details and make sure you subscribe to my YouTube Channel so you never miss a video.
Supplies:
All cards:
Pudding:
Cheese:
Wine:
Cookie:


No comments:
Post a Comment