Friday, July 31, 2020

Mini Paper Pumpkin Box Gift Card Holder-VIDEO

In my Facebook Live yesterday I shared this really cute gift card holder.  I used our new Mini Paper Pumpkin Boxes for this.  I've been wanting to use these boxes for a while and just haven't had the time. When I had this gift card holder in mind I knew that the Mini Paper Pumpkin boxes were the ideal candidate for this box.  I wanted to make a box similar to this box that I made years ago.  I love the way the gift card pops up when you open the box.  For the box I used the Flowers For Every Season DSP and Memories and More Cards.  There's zero stamping on this card.  Everything is from the Memories and More Kit and DSP.

The liner on the inside of the box is super easy.  You'll need a piece of cardstock that is 8 1/2" x 5 1/2" on the long side score at 3 1/4", 4 1/4", 5 1/4".  You'll need to cut a slot for the gift card.  I used my Paper Trimmer to do that but you can use an craft knife if you're more comfortable with that.  I've done it both ways.  In the video I used my paper trimmer.


After that assembly is super easy as you'll see in the video.  In addition to the gift card you could throw in lots of candy, chocolates or other treats.  I have a full shopping list below. 

Shop my Online Store.
Thanks for looking, see you soon!!!


Supplies:
Mini Paper Pumpkin Boxes
Flowers For Every Season DSP
Flowers For Every Season Memories and More
Poppy Parade Cardstock
Gold Gilded Gems
White Seam Binding
Paper Trimmer


Earn a $5 Bonus Days Coupon for every $50 you spend in July!  
Redeem in August.  There's no limit to how many you can earn! 

Wednesday, July 29, 2020

Rainbow Vellum Squares

Did you see Monday's card that featured the Best Plaid Die and the Rainbow Glimmer Paper.  If not head over there to check it out.  It's so pretty!!!  On that card I used vellum for the larger plaid die and I was left with a bunch of perfect vellum squares.  I didn't want to just toss them.  So I started by coloring a few of them with my blends.  I went for an ombre of color, dark on top, light on bottom.  After I did a couple I LOVED them and had to die cut more vellum squares.  All in all I die cut the vellum die twice.  Once for the card on Monday and for this card.  I'm saving the actual die cut vellum piece for another card later.  I just wanted those perfect squares.  I continued to color them in rainbow order, in an ombre fashion with my blends.
Once I was done coloring I started to lay them out in a pattern.  I used some DSP from the In Good Taste DSP pack and started adhering them down to the DSP.  Adhering vellum is tricky because you don't want it to show.  If I were to make this card again I would use our Adhesive Sheets and make them stickers to stick down.  For this card though, because I didn't think of that in advance I used my sticker maker to turn them into stickers.  The beauty of that kind of adhesive is that if the entire piece is covered with glue you can't see it.  But you can save time and skip a step if you go with the Adhesive Sheets to begin with.  I finished the card with a gold embossed greeting, on vellum and some gold twine from the Forever Greenery Pack.  I mounted the DSP on some Gold Foil then on my White card base.  It's so stunning and gorgeous.  I love the colors!!  I have a full supply list below.  
Thanks for looking, see you soon!!!

Supplies:

Earn a $5 Bonus Days Coupon for every $50 you spend in July!  
Redeem in August.  There's no limit to how many you can earn! 

Monday, July 27, 2020

Glimmer Rainbow Plaid

I can't stop using the Rainbow Glimmer Paper!!!  I knew I'd be a fan of it, but I didn't know how deep this obsession would go!  Full confession.....I just bought like 5 more packs of it!  I decided to try out my Best Plaid dies for this card and die cut the Rainbow Glimmer Paper with the plaid dies.  OMG!!!!  You guys!!!!  It's. So. Pretty!!!!! I wanted to use as much of it as I could and I knew I didn't want a flashy greeting to take away from that glimmer paper so I used a set from the Best Year Set.  Pro Tip! You can bundle the Plaid dies and the stamp set and save 10%.  Yay!!  I cut the plaid at a diagonal and attached a greeting with some ribbon from the Playing With Patterns Ribbon Pack.
I used the other layering plaid piece and die cut it from vellum.  I added a dot of Tombow glue behind each of the intersections to hold it down.  Then to hide the glue I added a sequin from the Artistry Blooms Sequins.  There's so much sparkle and shine on this card to make anyone happy!!!!  I have a full supply list below.  

Thank for looking, see you soon!!!


Supplies:


Earn a $5 Bonus Days Coupon for every $50 you spend in July!  
Redeem in August.  There's no limit to how many you can earn! 

Friday, July 24, 2020

Mickey and Minnie Bookmarks-VIDEO


Did you catch my weekly Facebook Live yesterday?  If not you can catch the reply on YouTube.  Every Thursday I go live to share a fun and cute project.  Yesterday was no exception, this project is CUTE!  Make sure you like and follow my Facebook page so you never miss a video.  In our house we have a summer routine for the kids and every Monday is craft day.  Well a couple of weeks ago we made some Mickey and Minnie bookmarks.  Both kids love to read so they're always looking for fun bookmarks.
After we made the bookmarks and I saw how cute they had come out I had to throw them onto some cards.  Our summer schedule is usually better planned then this year.  I normally have the kids in school in the spring to plan our summer we'll this year that wasn't the case and I've been planning our summer activities last minute.  I had no idea how these would come out.  I had a sketch in my head but sometimes that doesn't work.  So I was really pleasantly surprised when they were super cute!!!

The bookmarks are held closed with some magnetic tape and just hook onto each card.  They measure 8 1/2" x 2 1/2" scored in half at 4 1/4".  This would be suck a cute gift to give anyone!!!  I have a full supply list below for details on the bookmarks check out my video.

Shop my Online Store.
Thanks for looking, see you soon!!


Supplies:
Blossoms In Bloom Set
Real Red Cardstock
Melon Mambo Cardstock
Daffodil Delight Cardstock
Basic Black Cardstock
Whisper White Cardstock
Melon Mambo Ink
Daffodil Delight Ink
Daisy Punch
Detailed Trio Punch
Layering Circles Dies
Home Together Dies-Coming in the new 2020 August-December Mini Catalog
Dainty Diamonds Folder
Old World Paper Folder
Retired 1/2" Circle Punch
Magnetic Tape


Earn a $5 Bonus Days Coupon for every $50 you spend in July!  
Redeem in August.  There's no limit to how many you can earn! 

Wednesday, July 22, 2020

Wild About You

Today is the last day to RSVP for my Zany Zebra Stamp A Stack.  You can check out all the detail on that here.  I wanted to share one more quick example of how stinkin' cute these Zany Zebras are.  This card is not featured in my stamp a stack but just another example of what you can do with the zebras. This card is super simple but so impactful.  I love Red and Black together.  It's a pretty stunning combo.  There's no accessories on this card just cardstock and ink.  Isn't this sweet zebra so cute!!!  I adhered black and white stripes on my card base.  Each stripe is 1/2" wide. I stamped my zebra and greeting on a piece that is 2 1/4" x 5 1/2" and added some hearts to finish.  Soooo cute!!  You could make 100 of these in no time!!  I have a full supply list below.

Shop my Online Store.
Thanks for looking, see you soon!!!


Supplies:
Zany Zebras Set
Poppy Parade Cardstock
Basic Black Cardstock
Whisper White Cardstock
Poppy Parade Ink Pad
Black Memento Ink
Dog Builder Punch
Be Mine Stitched Dies


Earn a $5 Bonus Days Coupon for every $50 you spend in July!  
Redeem in August.  There's no limit to how many you can earn! 

Monday, July 20, 2020

July Stampin' Blends Club

I'm sooooo excited to announce my July Stampin' Blends Club!!!  This is going to be sooooo much fun!! Stampin' Blends are my favorite way to color, I love how seamless they look when you color and the variety of colors that they come in!!  Read on to find out how my Stampin' Blends Club will work.  
Every month I'll post a Stampin' Blends Host Code, when you purchase a minimum of $40 (before tax and shipping) using that host code you'll receive the class kit mailed to you FREE!!!!  It's that simple!  Only orders that use the host code will receive the project kit. What comes in your class kit? 
Your class kit will contain:
  • Supplies for 4 make and takes (you will need to provide stamps, ink and adhesive)
  • Surprise Thank YOU gift
  • Private video demoing all 4 projects and lots of tips and tricks on getting the most from your Stampin' Blends
Every month I'll focus the projects in the kit around 4 sets of Stampin' Blends and one stamp set.  You can choose which months you want to participate in.  Opt in every month with your $40 minimum order or skip a month.  Participate in 3 consecutive months and you'll get a FREE combo set of Stampin' Blends!  You choose the color and I'll mail them to you as a free gift!!!  Do you have to order Stampin' Blends to get the kit?  NO!!! Your $40 minimum order can be anything you need!  Maybe you already have all the Stampin' Blends but you want some new ideas.  Your order can be anything you want!!  You can add on the featured stamp set if you don't have it too! I won't be checking what you order, just as long as your order is at least $40 AND you've used the host code!  You will only receive one kit per qualifying order (example: if you order $80 you will NOT receive kits).
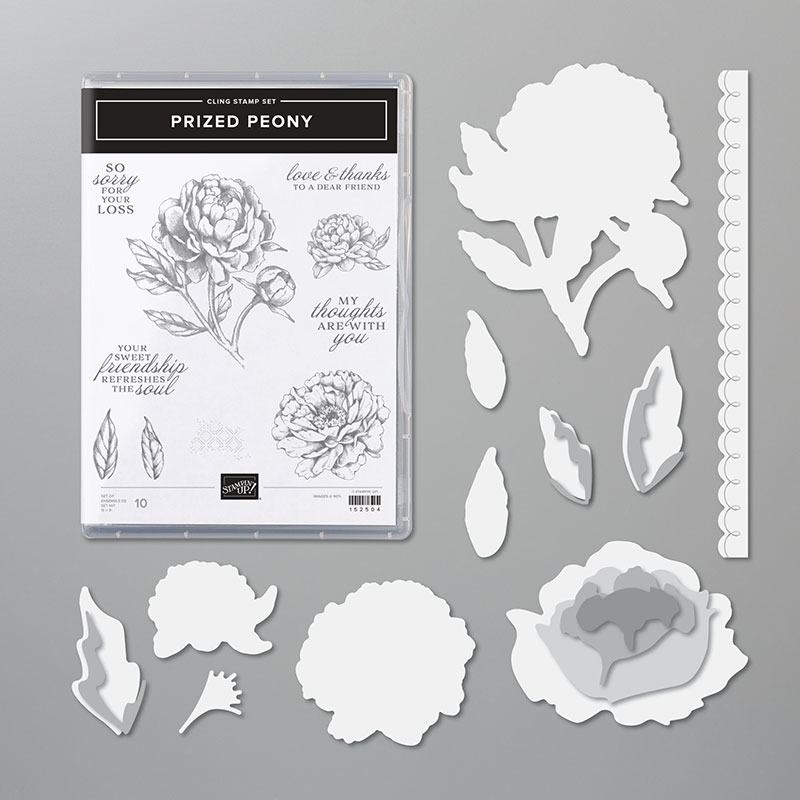
Sounds great right?!  I'm soooo excited about this club!  In July I'm featuring the Prized Peony Bundle!!!!  This bundle is gorgeous and I have some beautiful cards for you!  Stampin' Blends featured in June will be Petal Pink, Daffodil Delight, Magenta Madness and Just Jade.  I have a full list of supplies below you'll need to complete July's kit below.   
Orders must be in by July 31, 2020 to receive the kit.  Kits will ship no later than August 4, 2020.
To get June's Stampin' Blend Club Kit head to my online store and order using this host code G3JYADA9

Questions?  Please reach out to me and I'll be happy to answer them stamperrdn@q.com

Supplies needed to complete the cards.  Any other supplies you'll need will come in your kit.

Earn a $5 Bonus Days Coupon for every $50 you spend in July!  
Redeem in August.  There's no limit to how many you can earn! 

Strawberry Lemonade

Does anyone else out there think of card ideas in the middle of the night....or at 5:30am when you're laying in bed awake for no reason?  I hope it's not just me.  But when an idea that you think of at odd hours actually works, it's always so exciting!  I wanted to make a fun bright, strawberry lemony kind of card and I did!!!  It's sooooo cute too!!!! To create the cup of lemonade I used a piece of vellum that is about 2"x2".  I used Daffodil Delight and Flirty Flamingo Blends to color the vellum.  I die cut the 2nd largest Stitched Nested Label Dies and cut 2 slits in it.  Make sure your slits slant down at a slight diagonal to make it look more like a glass.  I then carefully slit each side of the vellum into the slits and adhered on the back of the label die.  I left the vellum in a curve to really make the glass pop.  The vellum sticks out about 1/2" so you won't be able to stick this in the mail but how cute would it be attached to a box or hand delivered.  LOVE!!! 
Once I got the glass figured out the rest of the card fell into place.  I used the diagonal stripe stamp from the Jar of Flowers set for a straw.  I added a lemon slice from the set from the Simply Citrus Kit Stamp Set.  I topped the glass off with a glittery umbrella!  Soooo cute!!!!  The lemons stamped in the background as well as the greeting are from the Simply Citrus Stamp Set as well.  It's such a cute stamp set and the cards in that kit are super cute!!!  I have a full supply list below. 

Shop my Online Store.
Thanks for looking, see you soon!!!!

Supplies:
Simply Citrus Card Kit
Jar Of Flowers Stamp Set
Flirty Flamingo Cardstock
Daffodil Delight Cardstock
Whisper White Cardstock
Vellum Cardstock
Rainbow Glimmer Paper
Daffodil Delight Ink
Flirty Flamingo Ink
Black Memento Ink
Flirty Flamingo Stampin' Blends
Daffodil Delight Stampin' Blends
Smoky Slate Stampin' Blends
Umbrella Punch
Stitched Nested Label Dies


Earn a $5 Bonus Days Coupon for every $50 you spend in July!  
Redeem in August.  There's no limit to how many you can earn! 

Friday, July 17, 2020

Bunch Of Bananas Box-VIDEO

Are you ready for the final box in this weeks Little Debbie week.  Don't forget to check out the snack finder on their website to find where you can get these cake in your area.  For this box when I saw that Little Debbie made a banana cake, ummmm hello that will go great with our Cute Fruit Set!!!  If you haven't checked out the Cute Fruit Set make sure you do. It's one of my favorites!!!!
For the box I stamped a bunch of bananas and fussy cut them out.  For those that don't like to fussy cut, you could stamp them on a circle and do some fancy masking but these are super simple and quick to cut out so take the extra time and cut them out, it's worth it!  I layered all my bananas on a Rainbow Glimmer Circle and added a couple bows to finish it off.  The greeting is also fussy cut, but use your own discretion on that one.  There's lots of room on the top or bottom of the box to add a greeting IF you truly hate to fussy cut.
I used the Artistry Blooms DSP and it's perfect for this box!!!  I LOVE this DSP so much, it might be one of my all time favorites.  But I love these more subtle sides of it.  So perfect for projects like this!
To make the box you'll need a piece of DSP or cardstock that is 8" x 8", on one side score at 1 1/4", 6 1/4" and 7 1/2". On the other side score at 1/2", 1 3/4", 4 1/4" and 5 1/2".  Here's how you need to trim up your DSP.  Make sure you refer to the video for detailed instructions.
I've mentioned this tip before but now that we don't have a 1/2" circle punch what do we use for our finger tabs.  Well if you still have your 1/2" punch you can continue to use that.  I still have mine but I wanted to come up with an alternate option for you.  I've been using my Perennial Flower Punch to add my finger notch.  You can see I've marked where it needs to be punched.  The punch is big and it's hard to center so I like to mark it.  I only punch off the tip of the petal.  This has worked great! I have a full supply list below.
Thanks for looking, see you soon!!!

Wednesday, July 15, 2020

Kick Up Your Heels Box-VIDEO

Welcome back to Little Debbie week, who knew that would even be a thing.  The boxes that I'm sharing are sized perfectly for these little snacks but you can put anything in them if you're not a fan of snack cakes or maybe you have a specific gift/person in mind to give this too.  Don't be limited to making the box simply because you don't want to use the snack cakes.  If you do however want to use the snack cakes check out the snack finder on their website to find where you can get these cake in your area.
Today's box is another super cute zebra box.  When I went shopping for the regular snack cakes from Monday's post I couldn't find the regular zebra cakes we know and love, but they had zebra rolls.  Ummmmm OK!!!  These are sized differently than the cakes so depending on which ones you're able to find you might have to make either box.  This box is a one piece flip top box.  I've made tons of these, I love this style of box.  They're easy and quick to put together. I have the measurements below but make sure to check out the video for box assembly. 
My zebra looks like she's ready to join an 80's rock band.  I love the pop of color and how fun and playful this whole thing is.  To make the box you'll need a piece of cardstock that is 7" x 7 1/2".  Since it's almost a square you need to be diligent to know which is your short and long sides.  On the short side score at 1 1/4" from each side.  On the long side score at 1", 3", 4 1/4" and 6 1/4". The belly band is 6"x2".  You can skip the belly band the box stays closed on it's own but it's super cute with!  If you're loving these zebras make sure you check out my Zany Zebras Stamp a Stack, registration is now open.  Check out the video below for full instructions.  I have a full supply list below too.  

Thanks for looking, see you soon!!!!


Supplies:


Earn a $5 Bonus Days Coupon for every $50 you spend in July!  
Redeem in August.  There's no limit to how many you can earn! 

Monday, July 13, 2020

Matchbox Slider Box-VIDEO

Welcome to Little Debbie week!!!!  These posts are not sponsored by Little Debbie but their snack cakes go soooo perfectly with some of our new products how could I NOT do a whole week of posts featuring Little Debbie cakes.  Also my kids love them so there's that perk too.  Any of the boxes I share this week will be perfect for gifts for anyone! Who doesn't need an extra pick me up now.  You could also use these boxes for party favors or class treats....when parties and classes resume of course.  If you need help finding these cakes in your area, check out the snack finder on their website.

Today I have a box that I shared last week during my Facebook Live.  It's a super cute matchbox slider box.  I LOVE it!!!!  It's an easy box to put together, it's nice and sturdy with the reinforced sides and the perfect gift box.  I'm using the Zany Zebras Stamp set for mine today because of course we're featuring.....
....Zebra Cakes!  How could I not use the Zany Zebra's set!?!  If you love this set, check out my Zany Zebra Stamp a Stack.  Registration is now open for it.  Don't miss it!  
The box is piece of cardstock that is 7 1/2" x 10 1/4".  I do recommend cardstock here and not DSP just because it's a matchbox and there's lots of tugging and pulling of the box, you'll want something sturdy.  I reinforced the sides of the box as well to help with the sturdy-ness.  You'll score your paper at 1" and 2 1/2" on all four sides.  Trim up your box as pictured.  Your belly band piece measures 9" x 5 1/4", on the long side score at 2 1/2", 4", 6 1/2", and 8".  To make sure the belly band lines up perfectly I stick a stack of 4 post it notes on the left side of my Simply Scored.  Butt up your cardstock to the post it notes, not the side of the scoring tool.  Trust me this works.  Check out the video for more details on the cutting and scoring of the box.  I have a full supply list below.

Shop my Online Store.
Thanks for looking, see you soon!!!


Supplies:
Zany Zebras Set
Coastal Cabana Cardstock
Flirty Flamingo Cardstock
Whisper White Cardstock
Brights DSP
Coastal Cabana Ink
Flirty Flamingo Ink
Simply Scored
Hippo Dies
Playing With Patterns Ribbon Pack
Elegant Faceted Gems

Earn a $5 Bonus Days Coupon for every $50 you spend in July!  
Redeem in August.  There's no limit to how many you can earn! 

Friday, July 10, 2020

Diagonal Gate Fold

Last night I had an amazing time with my team.  We did a Stamp Along Night via Zoom.  Prior to the stamp along, I send them a vague list of supplies to gather up.  Then together we make some cards.  I love these stamp along nights because everyone gathers different supplies and our cards are all so different!  I used the the Peony Dies for my cards. They're one of my favorites.  Just look at these flowers!?!

We made a fun diagonal gate fold card.  I'm not sure if there's a different name for these but that's what I'm calling it. To make your own you'll need a full sheet of 8 1/2" x 11" cardstock, score the long side at 5 1/2" and the short side at 4 1/4".  Then cut your paper in half diagonally.  You'll end up with a large triangle and when you fold on the score lines you'll have the perfect card base!  If you want to join my team so you don't miss our next stamp along check out all the amazing perks of being on my team here.  I have a full supply list below.

Shop my Online Store.
Thanks for looking, see you soon!!!

Supplies:
Peony Dies
Four Seasons Floral Set
Best Year Set
Gray Granite Cardstock
Magenta Madness Cardstock
Petal Pink Cardstock
Basic Gray Cardstock
Mint Macaron Cardstock
Just Jade Cardstock
Daffodil Delight Cardstock
Whisper White Cardstock
Peony Garden DSP
Magenta Madness Ink
Gray Granite Ink
Petal Pink Ink
Just Jade Stampin' Blends
Flowers For Every Season Ribbon Pack
Champagne Rhinestones
In Color Enamel Dots
Sponge Daubers
Stitched Shapes Dies
Layering Circles Dies

Earn a $5 Bonus Days Coupon for every $50 you spend in July!  
Redeem in August.  There's no limit to how many you can earn! 


Wednesday, July 8, 2020

Zany Zebras Stamp A Stack In The Mail!

I'm super excited to announce a new class this month!!!  It's a Stamp A Stack in the mail!!!  I've been LOVING the Zany Zebras Stamp set sooooo much!!!  Watch later this month you'll see lots of zebra projects from me!  I loved them so much that I had to come up with a class for this set!!!  The cards are sooooo cute!  I know you'll love them.  If you don't already own the Zany Zebra Stamp Set you can add it onto your class kit for only $19!  I'll pay the tax and shipping on it!

What does the class kit include?


  • You'll receive supplies to make 10 cards, 2 each of 5 designs.    
  • 1/4 Package of Brights DSP, you'll cut up the patterns you want to use on your cards.  Plus there will lots left over for more cards!
  • Full pack of Playing With Patterns Resin Dots
  • 1 sheet of Dimensionals
  • Free priority shipping to your door!  
  • PDF instruction 
  • Video instructions
This amazing Stamp A Stack is all yours and shipped to your door for only $30!!!!  Amazing deal!!!!  To RSVP for this Stamp A Stack you'll need to email me for the link to sign up.  If you need to add on the Zany Zebra Set please indicate that in the email.  Per SU policy I cannot list the link on my blog.  Email me at stamperrdn@q.com  This class is only available to USA residents, sorry I can't ship over borders.  

Last day to RSVP WITH payment is July 22, 2020.  Kits will ship no later July 31, 2020.  You'll receive an email with the PDF and video link when they ship.  

Any questions please contact me.  stamperrdn@q.com

Kits will NOT come stamped you will need stamps and ink to complete your kit.  Here's the list of supplies you'll need to have on hand to make sure you can complete your kit.  Additional supplies can be purchased from my Online Store.  Shop now

Stampin' Seal

Earn a $5 Bonus Days Coupon for every $50 you spend in July!  
Redeem in August.  There's no limit to how many you can earn! 


Monday, July 6, 2020

Pampered Pets-My Pets!

Hello!!!  I ended up taking a few days off last week unexpectedly.  It's become very clear to me that taking on too much isn't good for one's health.  As much as I LOVE blogging and sharing projects over the next few month's I'll have to cut back to posting 5 times a week to 3 times.  There's so much going on right now and cutting back on blogging will be one way to help me get back on track.  So look for posts every Monday, Wednesday and Friday.  I promise, the projects I have coming up are amazing!!!  Today's card is no exception! One of my favorite suites in the new catalog has got to be the Pampered Pets Suite.  Those little cats and dogs are so cute, but I think that the reason I LOVE them so much is because both our pets are represented!!  This little dog looks so much like our dog Chase!  The cat is a pretty spot on image of our cat Cinderella.  The only difference with the DSP cat and our cat is our cat is shades of gray not browns.  But the look that cat is giving.....I get that look daily from our cat.
Our cat is older, she's 17 years old.  She's been less than thrilled with all the time we've spent at home the last few day.  So daily, usually in the afternoon, she stares at everyone with this look of "why are you here alllllllllll the time?"  These two critters from the DSP are my favorite in the entire package.  The dies from the Pampered Pets Bundle will cut out the dog, but I had to fussy cut the cat.  The greeting on this card isn't from the Pampered Pets Set it's from the From All Of Us set.  But I thought for this card it worked perfectly!  If you haven't already check out the Pampered Pets Suite!  It's sooo cute!  I have a full supply list below. 


Thanks for looking, see you soon!!!

Supplies:
Pets Dies

Earn a $5 Bonus Days Coupon for every $50 you spend in July!  
Redeem in August.  There's no limit to how many you can earn! 


Thursday, July 2, 2020

Summer Wreath

Do you remember last week when I shared this card using the Arrange A Wreath Bundle? I have another fun card to share today!  This one is fun and bright and full of summer vibes.  I die cut the wreath layer three times for this card.  Twice with Granny Apple Green and once with Old Olive.  I layered them all up for a full full wreath. 
I stamped and die cut some of the flowers in Magenta Madness as well as just die cutting some in Mango Melody and Gorgeous Grape.  Aren't those colors just yummy together!!!  I also die cut a bow in Magenta Madness and added some Sparkling Crystal Effects on it to give it lots of fun texture.  Finally the greeting is heat embossed in white for a fun chalkboard look. 
The card is fun gate fold card, I love fun folds.  This is a really simple fun fold.  Take your 8 1/2" x 5 1/2" piece of cardstock and score at 2 1/8" from each side on the long side.  This makes the perfect gate fold card and sure to make anyone happy!  I have a full supply list below.  Pick up this bundle today!!!!

Shop my Online Store.
Thanks for looking, see you soon!!!

Supplies:
Arrange a Wreath Bundle
Granny Apple Green Cardstock
Old Olive Cardstock
Magenta Madness Cardstock
Mango  Melody Cardstock
Gorgeous Grape Cardstock
Whisper White Cardstock
Champagne Foil
Magenta Madness Ink
Black Memento Ink
VersaMark Ink
White Embossing Powder
Heat Tool
Pearls
Shimmery Crystal Effects 
Pinewood Planks Embossing Folder

Wednesday, July 1, 2020

Peony Card-VIDEO

Over the weekend in my VIP group I shared this gorgeous card featuring the Peony Dies.  These dies might look like a mess out of the package but I love how simple they are to put together to make stunning gorgeous cards!  This peony has tons of layers and texture!!!  It would be equally as gorgeous on a box or bag too.
To get the amazing texture I started by spritzing my flower pieces with some water and crumpling them up.  Sound crazy I know but it really adds so much texture.  Then I used my sponge daubers and added lots of shading to highlight each layer.  Finally for even more dimension I used Dimensionals between each layer.  This really makes each layer pop!  Get all the details on this card in my video below.  There's a full supply list below too.  Head to my Online Store and pick up this Peony Bundle today!


Thanks for looking, see you soon!!!!


Supplies: