One of the bundles in the Annual Catalog that immediately caught my eye was the Cuckoo For You Bundle. I love that it has an interactive mechanism and it's sooooo cute!!!! It's really easy to put together too. You can check out Stampin' Up!'s video here. The dies with this set are amazing too. I love all the details like the clock hands! So cute!!! I attached my clock hands with a brad so if you wanted you could move the time around.
The magic of this card comes when you push up on the center tab, the little door pops open!!! So amazingly cute!!! There's no shortage of what you can put in the door either! There's plenty of cute images and greetings in the stamp set that I didn't even tap into yet!
I stamped all my elements in Soft Suede Ink and used only Crumb Cake Blends and Soft Suede Blends to color my clock I wanted some nice brown, wood like textures, for this clock. I love how it came out. I love all the brown tones with the pop of Lovely Lipstick for the bird behind the door.
Thanks for looking, see you soon!!!!
Friday, August 30, 2019
Thursday, August 29, 2019
Nature's Beauty Sneak Peek
If you're looking through your Holiday Catalog (PS if you're in the USA and don't have one let me know. I'd love to pop one in the mail for you! Email me stamperrdn@q.com) you might have overlooked an amazing stamp set in very back of the catalog. The Nature's Beauty Set is amazing for a couple of reasons. First, the images are beautiful and just amazing on their own. Second, when you purchase this stamp set $3 of every sale goes toward mental health organizations. What great way for Stampin' Up! to give back and be a #sudifferencemaker I love that!!! Of course I had to have it!!!
I fussy cut the bunny for this card but he's pretty simple to cut out. I used Seaside Spray and Night of Navy for a beautiful color combo. I pulled out my Stitched Shapes and Stitched Nested Label Dies for beautiful layering. More new stuff from the Holiday catalog on this card are the ribbon and the greeting! The ribbon is the new Seaside Spray Metallic Ribbon and it's soooooooo pretty!!!! The greeting is also new from the Itty Bitty Christmas Set. You can't purchase these items until September 4th unless you purchase the starter kit now and add them to your starter kit. You can learn more about the Starter Kit and join here. Shop my Online Store here.
Thanks for looking, see you soon!!!
Wednesday, August 28, 2019
Tropical Chic Facebook Live
I have beautiful card to share with you using our amazing Tropcial Chic Stamp Set and Tropical Dies. This set and dies have been around for a while and every year I break it out in the heat of the summer. It's the perfect summer set! I used lots of bright colors on this card. I paired Coastal Cabana, Daffodil Delight and Melon Mambo with some Crumb Cake. I love these colors together!
This card is pretty simple, I did step up those flowers with a new product from the Holiday Catalog. Our new Shimmery Crystal Effects. EEEEK I love it!!!!! It makes the flowers look like enamel accents. So pretty!!!!! The next couple of weeks my Facebook Live's will be all over the place. With the kids in school my Tuesday afternoon slot is becoming a challenge so I'll be transitioning to a morning Live video, I just haven't figured out when. Next week though, I'll be doing a special 2 part Facebook Live in my Ruth's Stamping Corner VIP Group on September 4th to kick off the Holiday Catalog. If you're not already a member of this group make sure you join there will be prizes and lots of fun!!! (Note: those videos will not be uploaded to YouTube. You'll only be able to watch them in my VIP Group.) For all the details on this card check out the video. Make sure you subscribe to my YouTube channel and never miss a video. Shop my Online Store here.
Thanks for looking, see you soon!!!!
Tuesday, August 27, 2019
Perfectly Plaid Sneak Peek!
If you've follow my blog you know that I LOVE non traditional colors for Christmas cards. My favorite color to use for Christmas cards is Melon Mambo. Sure enough every year I have to make a couple Melon Mambo cards. When I saw this Perfectly Plaid set in the Holiday Catalog, I knew I had Melon Mambo plaid trees in my future and I LOVE them!!! This set won't be available until September 4th but add it to your list now. How fun is this card?! I stamped the tree over and over again covering the entire background. Make sure some of your trees go off the paper, that gives you a more continuous look, similar to a piece of DSP. I just used a clear block and lined them up as best as I could. Since this set is photopolymer it's pretty easy to do. You could use your Stamparatus if you were worried about exact placement.
Melon Mambo and Silver Glimmer Paper are a match made in heaven. I used the Tree Punch that you can bundle with this stamp set and punched out a tree with our Silver Glimmer Paper. The greeting is from the A Wish For Everything Bundle in the Annual Catalog. It's such a great set to have, definitely a staple in my craft room. I layered the tree and greeting on a 2" Circle and Starburst Punch. So pretty!!! You can shop my Online Store here.
Thanks for looking, see you soon!!!
Monday, August 26, 2019
Dino Days Facebook Live
Last week I had the cutest card on my Facebook Live. Since I was smack dab in the middle of my Mini Curvy Keepsake Week it didn't get posted. By the way did you LOVE last weeks marathon posting?! I had so many to share and I knew if I did one a day we'd be here forever, so I sucked it up, sat at the computer and did a marathon blogging session. I had tons of fun and I loved sharing all those ideas!!! I can't pick a favorite!! I hope you can!
Back to the card. For my Facebook Live last week I focused on the super ADORABLE Dino Days Bundle. If you're passing up this bundle because you think it's only for kids you're wrong! Most of the cards I've made with this bundle have been for adults. The greetings are so cute and funny! Along with the Dino Days Bundle I used the Dinoroar DSP. So stinkin' cute!!! I threw in two new Holiday Catalog items in the card too. The Pool Party cardstock was embossed with the new Hammered Metal Embossing Folder, (don't forget to add on the new Embossing Plate when you purchase new 3D folders). Those awesome rhinestones are new in the Holiday Catalog too! You can't purchase Holiday Catalog items now unless you're a demonstrator. You can add them to your starter kit when purchasing the kit this month too! Join today!!! For the rest of the details on this card check out my video below. Shop my Online store here.
You can check out all the details in the video below.
Thanks for looking, see you soon!!
Friday, August 23, 2019
Mini Curvy Keepsake Box Week: Camper
I have sooooo many projects to share all using the new Mini Curvy Keepsake Box coming in the new Holiday Catalog. This box is so amazing and so versatile! By the end of the week you'll have it on your wishlist! If you don't want to wait until September to purchase it, consider purchasing the starter kit and adding this along with all the other products you'll choose. When you purchase the starter kit through the end of August you'll get to choose $155 in product for only $99. You can learn more about it and sign up here. Of course please contact me stamperrdn@q.com with any questions! I shared all of these amazing boxes with my team last week in our Virtual Meeting. We have tons of fun like that!
We made it to the end of the week, the end of the 13 blog posts! This has been a record for me!!! I have never blogged this much in one week!!! I hope you've enjoyed this peek into all the fun you can have with the new Mini Curvy Keepsake Box. Today I have one of the cutest samples I made. I love the colors I love how cut it is I just love it all!!!!! This cute camper is one of my favorites. I started with a Coastal Cabana box and added some stripes to the top of it using a Light Bermuda Bay Stampin' Blend. Of course this camper needed some silver panels on the side so I used some Silver Foil Paper. The wheels are made with the 1" and 1/2" Circle Punches. Once I attached the wheels I realized that it was going to need a hitch (is that what they're called?) I cut another box with Coastal Cabana and only trimmed off one of the sides with the slit. I attached piece of cardstock on the bottom to hold it up which made this little parked camper just the cutest thing ever!!! I love it!!!
Thanks for looking, see you soon!!!!!
Mini Curvy Keepsake Box Week: Lovebug
I have sooooo many projects to share all using the new Mini Curvy Keepsake Box coming in the new Holiday Catalog. This box is so amazing and so versatile! By the end of the week you'll have it on your wishlist! If you don't want to wait until September to purchase it, consider purchasing the starter kit and adding this along with all the other products you'll choose. When you purchase the starter kit through the end of August you'll get to choose $155 in product for only $99. You can learn more about it and sign up here. Of course please contact me stamperrdn@q.com with any questions! I shared all of these amazing boxes with my team last week in our Virtual Meeting. We have tons of fun like that!
Of course I couldn't forget about Valentines Day. Isn't this sweet Lovebug cute!!!! I cut the box from Real Red Cardstock. I added a head using the 1 1/2" Circle Punch. His antenna's are the stem from the new Apple Builder Punch coming in the Holiday Catalog. Hi heart shaped dots are from the Dog Builder Punch. So cute!!!
I have one more project to share with you later and I just might have saved the best for last!!!! Check back later today!!!!
Thanks for looking, see you soon!!!!
Mini Curvy Keepsake Box Week: Butterfly
I have sooooo many projects to share all using the new Mini Curvy Keepsake Box coming in the new Holiday Catalog. This box is so amazing and so versatile! By the end of the week you'll have it on your wishlist! If you don't want to wait until September to purchase it, consider purchasing the starter kit and adding this along with all the other products you'll choose. When you purchase the starter kit through the end of August you'll get to choose $155 in product for only $99. You can learn more about it and sign up here. Of course please contact me stamperrdn@q.com with any questions! I shared all of these amazing boxes with my team last week in our Virtual Meeting. We have tons of fun like that!
This cute butterfly box is perfect for spring but it would also work great for a baby shower, bridal shower or birthday party favor. I cut 2 boxes one with Gorgeous Grape Cardstock and the other with a Gorgeous Grape pattern from the Brights DSP Pack. I punched 2 of the large butterflies in each color Gorgeous Grape, Highland Heather and Purple Posy using the Butterfly Duet Punch. I cut each butterfly in half and adhered them together. Fan out their wings a little and attach them on either sided of the handle.
Tomorrow is the last day of our Mini Curvy Keepsake Box week! I have 2 cute projects left!!!!
Thanks for looking, see you soon!!!!
Thursday, August 22, 2019
Mini Curvy Keepsake Box Week: Chick
I have sooooo many projects to share all using the new Mini Curvy Keepsake Box coming in the new Holiday Catalog. This box is so amazing and so versatile! By the end of the week you'll have it on your wishlist! If you don't want to wait until September to purchase it, consider purchasing the starter kit and adding this along with all the other products you'll choose. When you purchase the starter kit through the end of August you'll get to choose $155 in product for only $99. You can learn more about it and sign up here. Of course please contact me stamperrdn@q.com with any questions! I shared all of these amazing boxes with my team last week in our Virtual Meeting. We have tons of fun like that!
This chick is so stinkin' cute!!!! The chick is made with So Saffron Cardstock. I used Pumpkin Pie Cardstock for his beak and feek. The beak is just a scrap piece of cardstock I trimmed into a triangle. His feet are made with the Medium Daisy Punch. I made his wings using the Perennial Flower Punch and just trimmed off each petal.
I have one more cute spring project to share today!
Thanks for looking, see you soon!!!
Mini Curvy Keepsake Box Week: Bunny
I have sooooo many projects to share all using the new Mini Curvy Keepsake Box coming in the new Holiday Catalog. This box is so amazing and so versatile! By the end of the week you'll have it on your wishlist! If you don't want to wait until September to purchase it, consider purchasing the starter kit and adding this along with all the other products you'll choose. When you purchase the starter kit through the end of August you'll get to choose $155 in product for only $99. You can learn more about it and sign up here. Of course please contact me stamperrdn@q.com with any questions! I shared all of these amazing boxes with my team last week in our Virtual Meeting. We have tons of fun like that!
Today is all about Easter and spring. What better way to kick off Easter then with this super cute bunny!!!!! EEEEK he's so cute!!!! Start with a Whisper White Box and add some ears using the 2" Circle Punch. To create the ear shape punch one circle then feed the punched circle back into the punch slightly to create the ears. The eyes are made using the Circle Tab Punch, simply cut off the sides of the tab punch. The nose and blacks of the eyes were made using the 1/2" Circle Punch.
If you think he's cute check back later for TWO more cute projects!
Thanks for looking, see you soon!!!!
Wednesday, August 21, 2019
Mini Curvy Keepsake Box Week: Snowman
I have sooooo many projects to share all using the new Mini Curvy Keepsake Box coming in the new Holiday Catalog. This box is so amazing and so versatile! By the end of the week you'll have it on your wishlist! If you don't want to wait until September to purchase it, consider purchasing the starter kit and adding this along with all the other products you'll choose. When you purchase the starter kit through the end of August you'll get to choose $155 in product for only $99. You can learn more about it and sign up here. Of course please contact me stamperrdn@q.com with any questions! I shared all of these amazing boxes with my team last week in our Virtual Meeting. We have tons of fun like that!
How stinkin' cute is this stacked snowman!!!! I LOVE him sooo much! To make him you'll need 3 boxes in Whisper White Cardstock. His buttons are the 1/2" Circle Punch, his carrot nose is the Christmas Bulb Punch and his hat is the Pretty Label Punch. That's it!!! To stack them I simply used a craft knife and cut a slit in the bottom of one of the boxes and slid the handle of another box into it. That's it!!! There's no adhesive, just a small slit and they stack and stay together perfectly!!!
I still have soo much more to share tomorrow!
Thanks for looking, see you soon!!!
Mini Curvy Keepsake Box Week: Reindeer and Sleigh
I have sooooo many projects to share all using the new Mini Curvy Keepsake Box coming in the new Holiday Catalog. This box is so amazing and so versatile! By the end of the week you'll have it on your wishlist! If you don't want to wait until September to purchase it, consider purchasing the starter kit and adding this along with all the other products you'll choose. When you purchase the starter kit through the end of August you'll get to choose $155 in product for only $99. You can learn more about it and sign up here. Of course please contact me stamperrdn@q.com with any questions! I shared all of these amazing boxes with my team last week in our Virtual Meeting. We have tons of fun like that!
These adorable reindeers are what started this whole thing. I had this idea one morning and while the kids were away I put it into action and created 9 adorable reindeers. They're all created the same so it was just a matter of mass assembly. Their heads are created with a new ornament punch in the Holiday Catalog. I simply trimmed off the top of the ornament. Their noses are 1/2" Circle Punch and their antlers are branches that come with the Mini Curvy Keepsake Dies. That's it!!! I added some bells to them, of course! I used googlie eyes for them cause it's so cute!
I ended up adding tails to them by trimming the middle out of the Everyday Label Punch. The reindeers are all cut out of Soft Suede and their antlers from Crumb Cake. I gave all but one an Early Espresso Nose. Rudolph of course has a Real Red nose.
After the reindeer were made I *HAD* to have a sleigh. So trial and error I ended up creating one I like. I created this free PDF tutorial on the sleigh. I love this project so much. I think it would be so cute on a holiday table, buffet or anywhere. You could fill the sleigh with candy or other treats then at the end of the night everyone could take a reindeer home. So cute!!!!!
Don't forget to check back tomorrow for EVEN MORE cute projects with the Mini Curvy Keepsake Die!
Thanks for looking, see you soon!!!
Mini Curvy Keepsake Box Week: Santa Belt
I have sooooo many projects to share all using the new Mini Curvy Keepsake Box coming in the new Holiday Catalog. This box is so amazing and so versatile! By the end of the week you'll have it on your wishlist! If you don't want to wait until September to purchase it, consider purchasing the starter kit and adding this along with all the other products you'll choose. When you purchase the starter kit through the end of August you'll get to choose $155 in product for only $99. You can learn more about it and sign up here. Of course please contact me stamperrdn@q.com with any questions! I shared all of these amazing boxes with my team last week in our Virtual Meeting. We have tons of fun like that!
I hope you're enjoying all these ideas and how simple this box is to make some amazingly cute projects!! Today is all about Christmas. I have three posts today and I PROMISE you do NOT want to miss any of them!!!!! First is Santa's belt, it's so simple!! Plus if you did it in a green it could be an elf belt!!! The box if made from Real Red Cardstock and I added a belt using Basic Black Cardstock and a belt buckle with some Gold Glimmer Cardstock. That's it!!!! Couldn't be cuter or simpler!
Check back later for 2 more amazing posts!!!
Thanks for looking, see you soon!!!
Tuesday, August 20, 2019
Mini Curvy Keepsake Box Week: Turkey On A Platter
I have the MOST amazing week of projects for you!!! So much so that I'll be posting twice a day, sometimes three times a day!!! I have sooooo many projects to share all using the new Mini Curvy Keepsake Box coming in the new Holiday Catalog. This box is so amazing and so versatile! By the end of the week you'll have it on your wishlist! If you don't want to wait until September to purchase it, consider purchasing the starter kit and adding this along with all the other products you'll choose. When you purchase the starter kit through the end of August you'll get to choose $155 in product for only $99. You can learn more about it and sign up here. Of course please contact me stamperrdn@q.com with any questions! I shared all of these amazing boxes with my team last week in our Virtual Meeting. We have tons of fun like that!
This turkey might be one of my favorites!! How cute would this be on the plates of all your Thanksgiving guests!?! He's super easy to make!!!! Cut the box with some Soft Suede Cardstock and lightly sponge all the edges with some Soft Suede ink. For the turkey legs I used two punch the Balloon Bouquet Punch and the basket from the Hot Air Balloon Punch. The platter is cut with the 2 1/4" Circle punch and garnish was added with the Sprig Punch. Couldn't be cuter!!!
Thanks for looking, see you soon!!!
Mini Curvy Keepsake Box Week: Pumpkin
I have the MOST amazing week of projects for you!!! So much so that I'll be posting twice a day, sometimes three times a day!!! I have sooooo many projects to share all using the new Mini Curvy Keepsake Box coming in the new Holiday Catalog. This box is so amazing and so versatile! By the end of the week you'll have it on your wishlist! If you don't want to wait until September to purchase it, consider purchasing the starter kit and adding this along with all the other products you'll choose. When you purchase the starter kit through the end of August you'll get to choose $155 in product for only $99. You can learn more about it and sign up here. Of course please contact me stamperrdn@q.com with any questions! I shared all of these amazing boxes with my team last week in our Virtual Meeting. We have tons of fun like that!
What says fall more than a super cute and simple pumpkin!!!!?! This cute pumpkin couldn't be easier. Cut your box die out with some Pumpkin Pie cardstock. Then add some wonky stripes using a Light Pumpkin Pie Blend. Finally add a stem and some leaves. I just used a scrap of Soft Suede for my stem and the Leaf Punch with Garden Green Cardstock for my leaves. Super cute!!! You could also make an apple for a teacher!
I have one more SUPER CUTE project later today! Check back!!
Thanks for looking, see you soon!!!
Mini Curvy Keepsake Box Week: Turkey
I have sooooo many projects to share all using the new Mini Curvy Keepsake Box coming in the new Holiday Catalog. This box is so amazing and so versatile! By the end of the week you'll have it on your wishlist! If you don't want to wait until September to purchase it, consider purchasing the starter kit and adding this along with all the other products you'll choose. When you purchase the starter kit through the end of August you'll get to choose $155 in product for only $99. You can learn more about it and sign up here. Of course please contact me stamperrdn@q.com with any questions! I shared all of these amazing boxes with my team last week in our Virtual Meeting. We have tons of fun like that!
Today is all about Thanksgiving and fall, so of course there had to be a turkey! He's super easy to make too!!! I cut him out of Crumb Cake Cardstock and sponged all the edges with Crumb Cake ink. His feathers and beak are all made using the Christmas Bulb Punch. I added googlie eyes, they're so cute!!! I made his wings using the Perennial Flower Punch and just trimmed off each petal.
I have TWO more posts today! Check back later for more cute projects!
Thanks for looking, see you soon!!!!
Monday, August 19, 2019
Mini Curvy Keepsake Box Week: Mummy
I have the MOST amazing week of projects for you!!! So much so that I'll be posting twice a day, sometimes three times a day!!! I have sooooo many projects to share all using the new Mini Curvy Keepsake Box coming in the new Holiday Catalog. This box is so amazing and so versatile! By the end of the week you'll have it on your wishlist! If you don't want to wait until September to purchase it, consider purchasing the starter kit and adding this along with all the other products you'll choose. When you purchase the starter kit through the end of August you'll get to choose $155 in product for only $99. You can learn more about it and sign up here. Of course please contact me stamperrdn@q.com with any questions! I shared all of these amazing boxes with my team last week in our Virtual Meeting. We have tons of fun like that!
This mummy box is so cute!!! To make him I cut the box from Very Vanilla cardstock. I tore strips of Vanilla cardstock and sponged them with Sahara Sand Ink. I adhered all the strips onto the box. His eyes are done the same way Frankenstein's eyes were made with the Circle Tab Punch and the 1/2" Circle Punch. Tomorrow we're taking on Fall and Thanksgiving with THREE posts! Don't miss it!!
Mini Curvy Keepsake Box Week: Frankenstein
I have the MOST amazing week of projects for you!!! So much so that I'll be posting twice a day, sometimes three times a day!!! I have sooooo many projects to share all using the new Mini Curvy Keepsake Box coming in the new Holiday Catalog. This box is so amazing and so versatile! By the end of the week you'll have it on your wishlist! If you don't want to wait until September to purchase it, consider purchasing the starter kit and adding this along with all the other products you'll choose. When you purchase the starter kit through the end of August you'll get to choose $155 in product for only $99. You can learn more about it and sign up here. Of course please contact me stamperrdn@q.com with any questions! I shared all of these amazing boxes with my team last week in our Virtual Meeting. We have tons of fun like that!
Today we'll start with Halloween. How stinkin' cute is this little Frankenstein!!!!! I cut the box out of some Granny Apple Green Cardstock and some Basic Black Cardstock. On the Black one I trimmed some hair for him and adhered it to the Granny Apple Green Box. I just love him! I cut some bolts from some Silver Foil Cardstock. For his eyes I used the Circle Tab Punch and just cut off the ends. I used the 1/2" Circle Punch for the blacks of his eyes. I finished the box by drawing on some scars. He's so cute! Don't forget to check back all week I still have twelve more amazing boxes to share!
Thanks for looking, see you soon!!!
Friday, August 16, 2019
Virtual Make and Takes
Last night I held a virtual meeting for my amazing team! I've started do this every other month for my team and I love it!!! I prep make and takes in advance and mail them to those who RSVP for the virtual meeting in advance so they have the make and take supplies for the meeting. They only provide ink, stamps and adhesive. The we do a virtual meeting via Facebook Live in my private demo group. I share lots of demos and we make the make and takes together. Here's the 2 from our meeting last night.
I love how bright and fun they both are! Don't forget now is an incredible time to join my team! Plus when you do you'll be invited to an exclusive event on Friday, September 6 with Donna Griffith from the Stampin' Up! home office. When you join the Stampin' Up! Family you will receive an additional $30 to put toward bonus products in your Starter Kit. THEN, you’ll receive a $10 coupon code the following month! Extra your first month and Extra your second month! With the additional $30 in product when you join you'll get to choose $155 in products for only $99!!! I know you're thinking, "This deal is too good, there must be some strings attached!?" Let me reassure you there are no strings, it is exactly what it sounds like $155 in product for $99! There is no commitment to sell, hold classes or make a business out of it. You'll simply enjoy a discount on all future purchases as a demonstrator, plus get sneak peeks to new catalogs and more! Plus as a member on my team you'll get even more perks! All my team members are invited to our private Facebook Group where we have tons of fun! I share lots of tips, techniques, cards, we play games and more. I hold exclusive meetings for my team members, we do swaps, service projects and more. I spoil them once a year at my Team Appreciation Event and my team always gets all my PDFs at no charge. Now is a great time to join! If you'd like more information please contact me stamperrdn@q.com or if you're ready to join my team, JOIN TODAY!
Thanks for looking see you soon!!!
Thursday, August 15, 2019
Don't Forget!
Don't miss out on these deals!
First is our Extra, Extra Deal. Until August 31, when you join the Stampin' Up! Family you will receive an additional $30to put toward bonus products in your Starter Kit. THEN, you’ll receive a $10 coupon code next month! Extra your first month and Extra your second month! With the additional $30 in product when you join you'll get to choose $155 in products for only $99!!! I know you're thinking, "This deal is too good, there must be some strings attached!?" Let me reassure you there are no strings, it is exactly what it sounds like $155 in product for $99! There is no commitment to sell, hold classes or make a business out of it. You'll simply enjoy a discount on all future purchases as a demonstrator, plus get sneak peeks to new catalogs and more! Plus as a member on my team you'll get even more perks! All my team members are invited to our private Facebook Group where we have tons of fun! I share lots of tips, techniques, cards, we play games and more. I hold exclusive meetings for my team members, we do swaps, service projects and more. I spoil them once a year at my Team Appreciation Event and my team always gets all my PDFs at no charge. Plus you'll be invited to an exclusive event on Friday, September 6 with Donna Griffith from the home office!!! Now is a great time to join! If you'd like more information please contact me stamperrdn@q.com or if you're ready to join my team, JOIN TODAY!
In August you can redeem your Bonus Days coupons on any products! Don't forget to use those coupons! Shop now to earn your coupons!
Please contact me with any questions.
Thanks for looking, see you soon
Wednesday, August 14, 2019
Back To School Backpack Boxes
At my class last weekend I gave out these adorable backpacks as a thank you to all who attend my classes in person. These are super cute and really easy! You could get 2 boxes from 6"x6" DSP or 8 boxes from a piece of 12"x12" DSP!! That's maximum use of your DSP! I loved these backpacks so much I wanted to share how I made them in my weekly Facebook Live. Aren't they just perfect for back to school?!
To make them you'll need a piece of DSP that is 3"x6". On the long side score at 2"x 2 3/4", 4 3/4" and 5 1/2". On the short side score at 3/4". The backpack flap 1 7/8"x4" on the long side score at 1 7/8". The backpack straps two pieces 3/8" x 3" on the long side score at 3/8" from each end. For all the rest of the details on this cute backpack check out my video below. You can shop my online store here.
Thanks for looking, see you soon!!!!
Tuesday, August 13, 2019
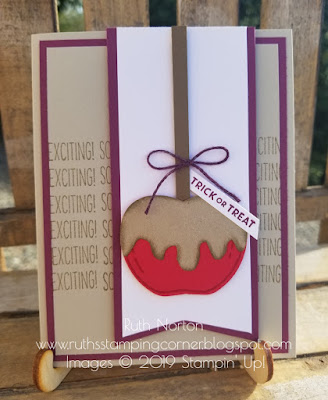
Caramel Apple
I have another fun sneak peek from the Holiday Catalog for you today. I love the new Harvest Hellos set. It might be one of my favorite sets in the Holiday Catalog. Last week I shared this adorable card featuring this bundle. Today I have another super cute card to share with you. Check out the video below to see all the amazing details of this card.
This bundle isn't available for purchase yet but you can get it now when you purchase the Starter Kit from me. This month you can choose $155 in product for only $99!! It's an incredible deal and it's only here for a limited time don't miss this amazing deal!!! You can add this new bundle along with anything else from the Holiday Catalog in your starter kit. Ready to join? Join the fun here. Still have questions, email me and I'd love to answer them stamperrdn@q.com
To shop my online store head here
Thanks for looking, see you soon!!!
This bundle isn't available for purchase yet but you can get it now when you purchase the Starter Kit from me. This month you can choose $155 in product for only $99!! It's an incredible deal and it's only here for a limited time don't miss this amazing deal!!! You can add this new bundle along with anything else from the Holiday Catalog in your starter kit. Ready to join? Join the fun here. Still have questions, email me and I'd love to answer them stamperrdn@q.com
To shop my online store head here
Thanks for looking, see you soon!!!
Subscribe to:
Posts (Atom)