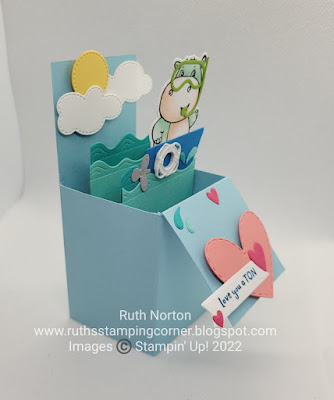
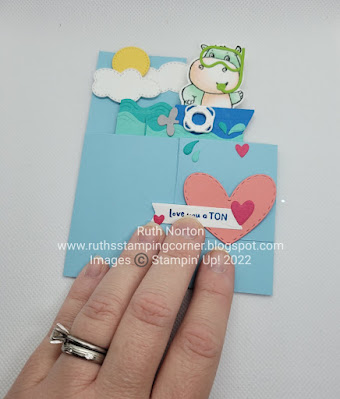
It's another Sale-a-Bration Sunday and another super cute project! Today we're making a box card...or card box....I'm not sure of the official name but this card pops into a box from the envelope and you have an adorable scene that pops ups from the box. It is so cute! It will impress anyone you give it and you can make it with products you earn FREE! Today I'm featuring the Hippo Dies. These dies are FREE during Sale-a-Bration with a $50 qualifying order. We're also using the Hippest Hippos Set which you can also earn free with a $50 qualifying order. Earn the bundle FREE with a $100 order during Sale-a-Bration.
The great part about these dies are all their little pieces and accessories. Of course they're made to coordinate with the hippos in the Hippest Hippos set but I bet you probably have some other stamps and cute critters that these will coordinate with too. Today we're gonna use the hippos but I'd love to see what you create with these dies and other sets!
The box card is super easy to make it doesn't take any more cardstock then a normal card and it will fold up to fit in an envelope. My card box is made with Balmy Blue Cardstock. You'll also need two tabs my tabs are also made from Balmy Blue.
Card Box
5" x 8 1/2"
On the long side score at 2", 4", 6" and 8" turn cardstock so the 1/2" tab is on the bottom
Score short side at 2" stopping at the 6" score line
Tabs
3 1/4" x 1" (two)
On the long side score at 5/8" each side
How you build your box card from here will depend on what you want. I chose to trim off the side tabs, but you could leave them on if you wanted. Holding my paper in landscape orientation with the 2" section on the top I trimmed off the first and third section. The fourth section should NOT have a horizontal score line. I also trimmed my 1/2" tab by cutting about 2" off the top. (Check video for more details!). Add adhesive to the 1/2" tab and creat a box. The front will fold down and the back will stand up.
For the tabs inside add adhesive to the ends and tuck into the box. I assembled all of my pieces onto those tabs. For my water I cut 2" squares from Bermuda Bay and Coastal Cabana and die cut them with the waves die in the set. They're adhered to the tab sandwiching the tab between them. Bermuda Bay Adhere on the back of each tab and Coastal Cabana adhered on the front of each tab. I added lots of accessories using the dies, cardstock and adhesive sheets! Don't forget those! I have a full supply list below. Make sure you check out my video for all the details. Don't forget to subscribe to myYouTube channel so you never miss a video. I have a full supply list below, you can shop for these products in my Online Store.
Supplies:


No comments:
Post a Comment